This guide will walk you through how to set up Media File Renamer to rename your media files using AI. You can follow along whether you’re using the Free or Pro version. However, keep in mind that the Free version doesn’t include Vision, so your results might be less accurate or relevant.
First, you’ll need to install AI Engine, this is the AI toolbox that enables Media File Renamer to use artificial intelligence for renaming your files.
After installing AI Engine, follow this documentation, to set up your environment. You don’t need to create a chatbot, but going through these steps will show you how to properly configure your environment, which is required for Media File Renamer to query the AI services.
Now you’re ready to head over to the Media File Renamer dashboard. Once the plugin is installed, the default interface should look like this:
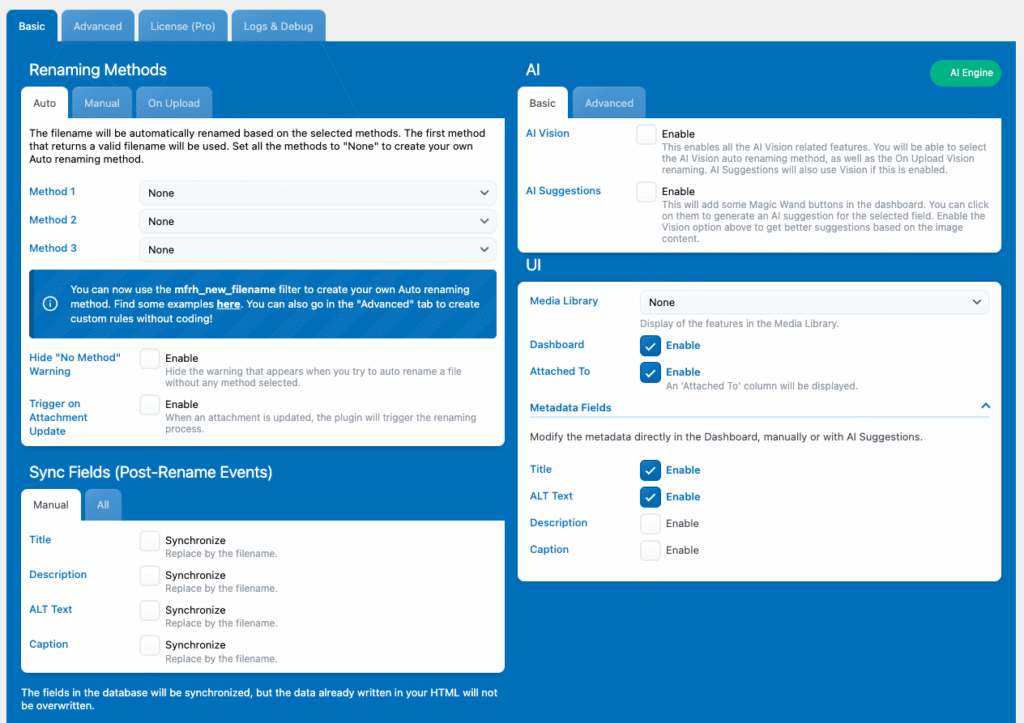
You should now see a green “AI Engine” label, confirming that the plugin is correctly installed and connected.
Next, simply enable the “AI Vision” option, this allows the plugin to analyze your images visually and generate more accurate, context-aware filenames.
You don’t need to enable “AI Suggestions” right now, but you can if you’d like. That feature just adds a few extra buttons you can click anytime to generate AI-based naming suggestions for your files, regardless of your current renaming method.
Now, you’ll be able to select the “AI Vision” renaming method:
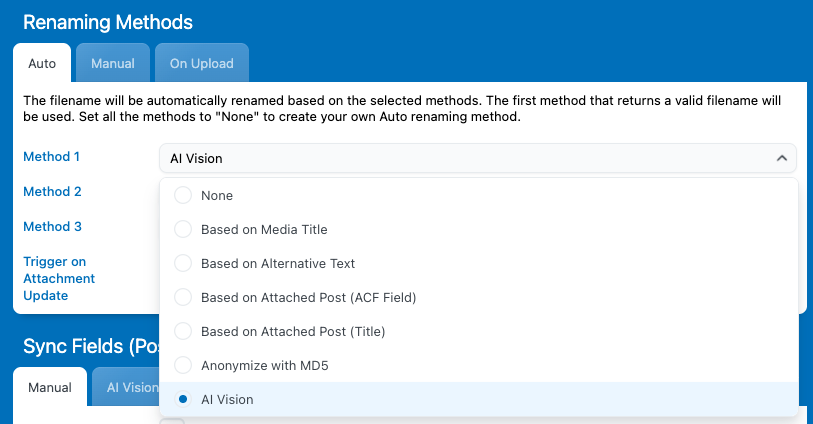
Now, Media File Renamer is set to rename your files using the AI Vision method whenever you trigger a renaming. You can do this directly from the dashboard using the AUTO button.
Keep in mind that Vision is just one of several available methods for automatic renaming, you can switch between them depending on your needs or the type of files you’re working with.
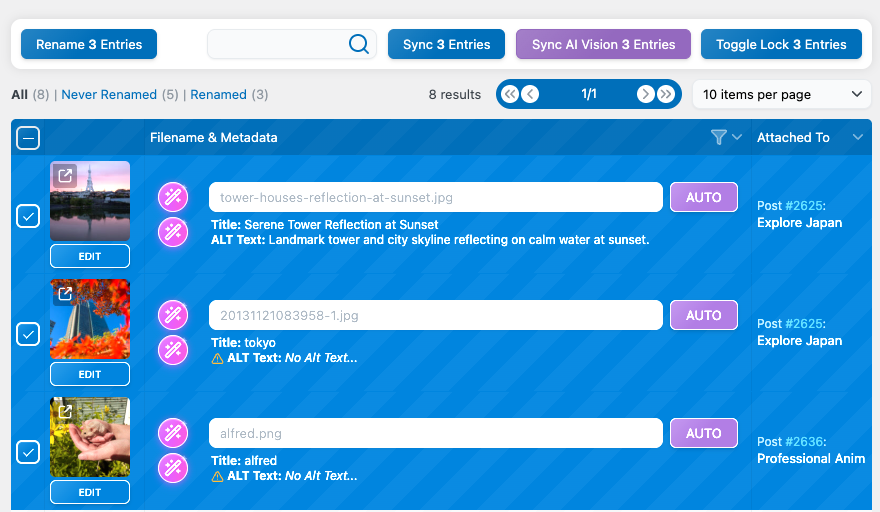
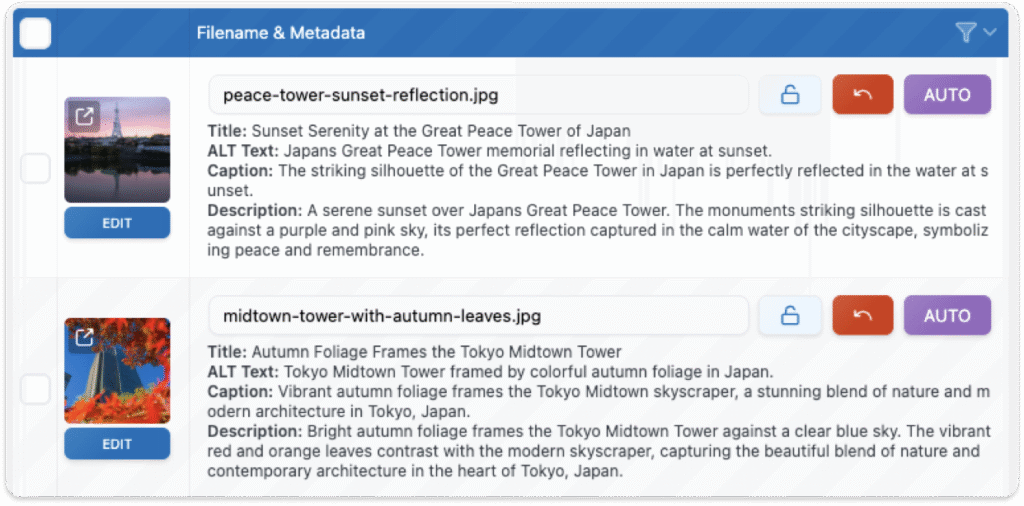
Now, go to the dashboard, where you’ll see your list of media files. Each file should have a purple “AUTO” button next to it — and in Meow Apps plugins, purple means AI is at work.
Try clicking the AUTO button to see the renaming in action. Media File Renamer will use the AI Vision method you selected to analyze and rename your file automatically, generating smart, descriptive filenames based on its visual content.


If at this point you see an error message saying “No suggestion”, it likely means that your AI environment in AI Engine isn’t set up correctly.
Double-check that your environment and API key are properly configured, and ensure your account is funded. OpenAI models aren’t free to us, if you haven’t added a payment method, your requests will be blocked.
There are free alternatives, such as OpenRouter models, which you can use instead. Just make sure that after switching, you set your default Vision model to the correct environment in AI Engine to ensure everything works smoothly.
And that’s it! You’ve successfully renamed a file using AI.
If you’d like to rename multiple files at once, you can easily bulk rename them: just select the media items you want to rename and click “Rename X Entries.”
Alternatively, if you don’t select anything, you can hit the “Rename All” button, this will trigger the auto-renaming process for every media file in your library.
Generating Meta Data
Changing the filename is just the first step, but to fully optimize your media, you’ll also want to generate the metadata that goes with it. Metadata helps improve SEO, accessibility, and overall media organization.
There are several ways to generate or enhance your media metadata, and we’ll explore each of them in the next sections.
Generate with renaming
Media File Renamer includes a feature called “Post-Rename Events”, which allows you to trigger specific actions after a file has been renamed. This is typically used to sync your media metadata with the new filename, for example, updating the title or alt text to match.
However, when using AI, you can take this a step further. Instead of simply syncing existing data with the new filename, you can actually generate brand-new metadata directly from the AI’s analysis of your media files.
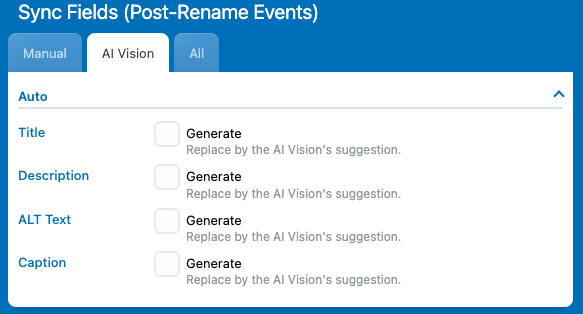
In the Settings, navigate to the Sync Fields section. Under the AI Vision tab, open the “AUTO” section, this is where you can configure which fields should be automatically updated or generated.
From there, simply select all the fields you want to be generated whenever your media files are renamed using the AI Vision method. Once selected, every time AI Vision renames a file, it will also create matching metadata automatically based on the image’s content.
Generate without renaming
You might also want to generate metadata for media files without renaming them.For example, if their filenames are already good or if they were renamed using another auto method but you still want AI-generated metadata.
In that case, go to the dashboard, select the media files you want to process, and click the “Sync with AI Vision” button in the toolbar. This will trigger the Sync event using AI Vision, generating titles, alt texts, and descriptions without changing the filenames.
As this is re-triggers the sync event, only the fields you have selected in the Sync Fields will be affected.

Generate manually
If you want to generate AI metadata manually, for specific fields or specific media file, you can do that too.
Go to the settings, and under the AI Vision section, enable the AI Suggestions option we mentioned earlier.
Once enabled, you’ll see wand icons appear in your dashboard. These let you generate metadata with a single click:
- You can generate filenames

- All displayed metadata at once

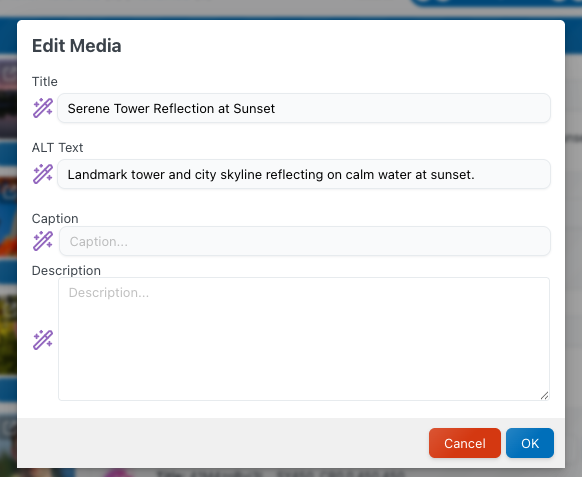
- Individual fields by clicking the “Edit” button under a media item to open the edit modal and generate the desired field directly from there.