You can manually edit the metadata fields of your media directly through the dashboard. If you prefer to automatically sync them with your auto-rename method, check the corresponding documentation instead.
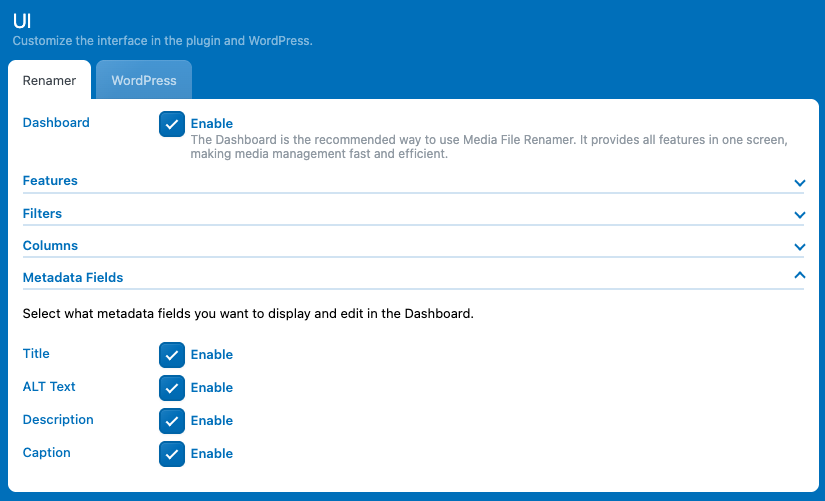
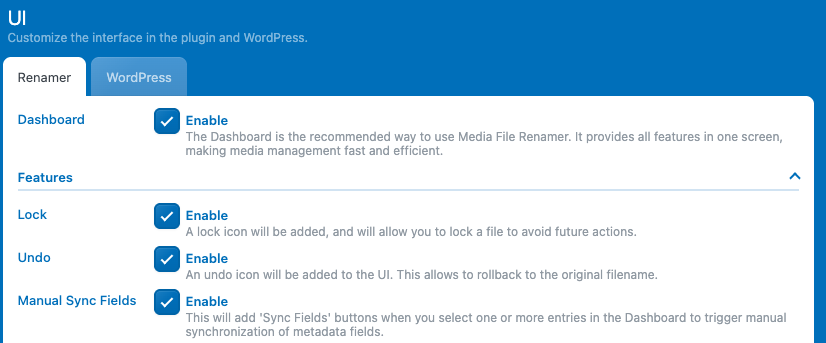
You can choose the metadata fields you want to show/hide. To do so, first enable the “Expert Mode” from the header toggle, then go to Settings → UI → Renamer → Metadata Fields, then select which metadata fields you want to view and edit. In this example, we’ll enable all of them: Title, ALT, Description, and Caption.
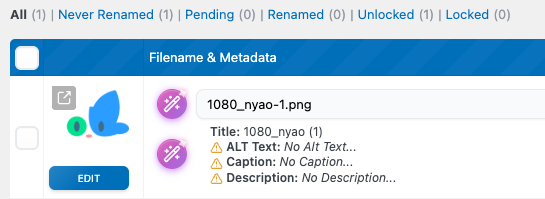
Then, in the dashboard, you should now see all the selected metadata fields Title, ALT, Description, and Caption listed directly under each media item, ready for you to view or edit.
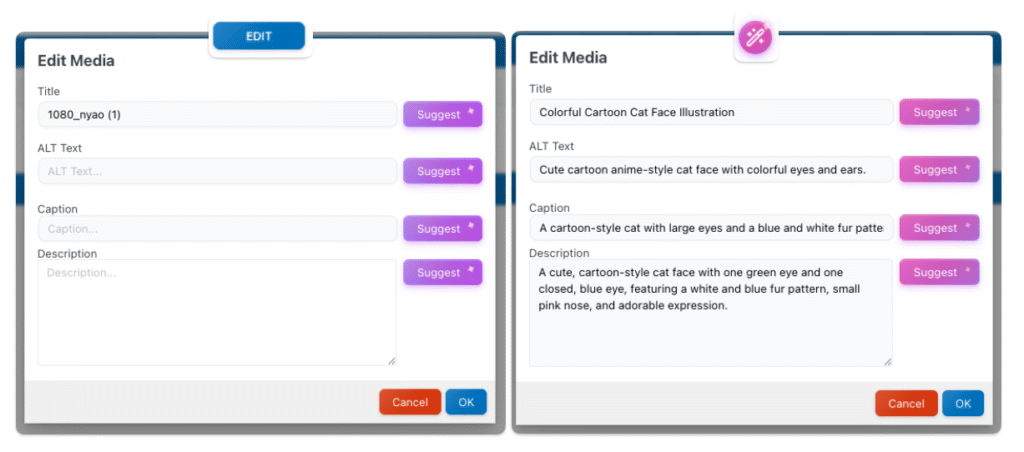
Now, click the “Edit” button under the image to open a modal where you can edit each metadata field.If you’re using AI, you can click the “Suggest” button next to each field to get an AI-generated completion.
You can also click the wand icon instead of “Edit”, this will open the same modal but automatically use AI to generate all fields at once, allowing you to fill in all metadata in a single step.
Manual Bulk Sync Metadata
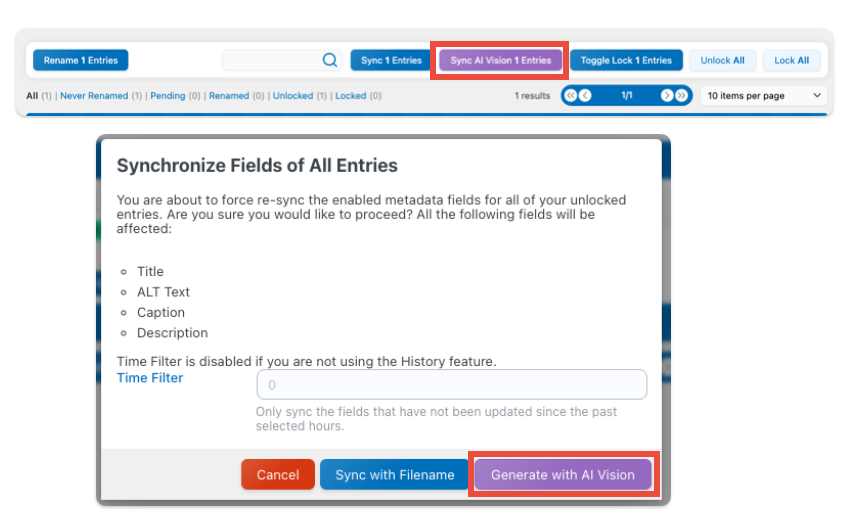
You can also manually trigger the metadata field sync, which means all your selected metadata fields will be updated to match their corresponding filename values.
Make sure the Expert Mode is enabled in the Settings header to see this in the UI section, then enable the “Manual Sync Fields“.

To do this, you can bulk select the media items you want to update, or leave everything unselected and click “Sync Fields” to apply the sync to all files in the current category you’re viewing.
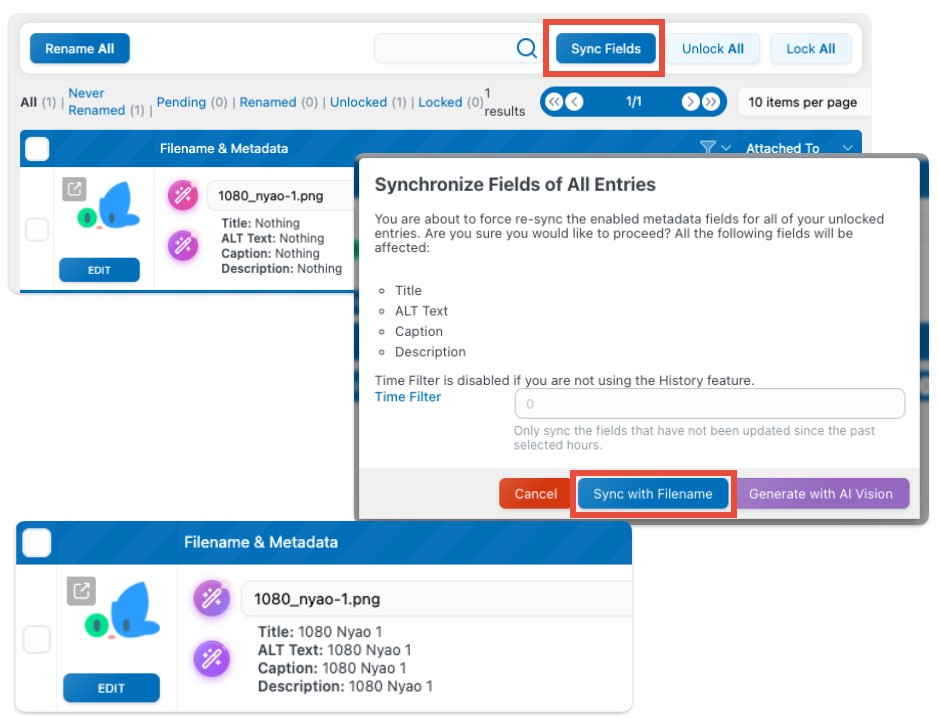
If you’re using AI, you can choose “Generate with AI Vision” instead of “Sync with Filename”. This option uses AI to create unique metadata entries for each media file, generating personalized values for every selected field instead of simply copying the filename.